Advanced Codegen Setup for Shopify Admin API in Hydrogen — Developer Guide


At FocusReactive, we live and breathe modern web development. As a tech consultancy with deep expertise in Next.js, Headless CMS, and eCommerce, we’re always looking for ways to build better applications that are scalable and maintainable.
For brands that want to deliver high-quality, content-rich shopping experiences, Shopify’s headless suite, Hydrogen, gives you a solid foundation. But to really make the most of it, you need a development workflow that’s efficient and minimizes errors.
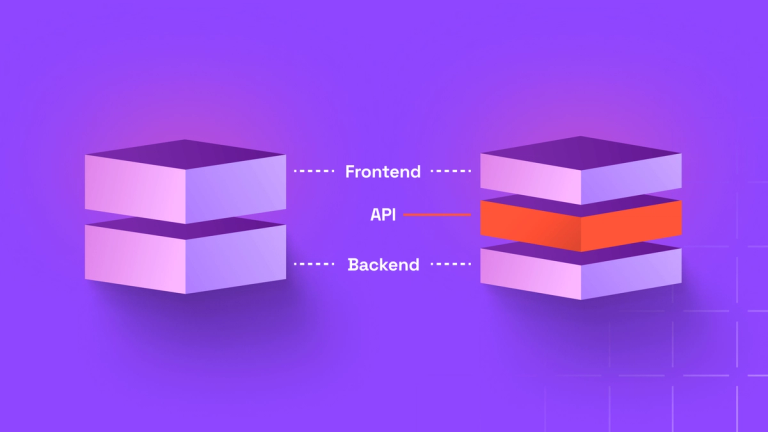
Shopify is a huge platform with dozens of APIs covering everything from payments and shipping to analytics and marketing. While you can explore the full range at https://shopify.dev/docs/api, there are three APIs that play a key role in any Hydrogen application. The good news is that two of them come pre-configured in every Hydrogen project, but you’ll need to set up the third one—the Admin API—yourself:
- Storefront API: The public-facing API for fetching product data, managing carts, and handling customer checkout
- Customer Account API: A specialized API for managing all aspects of a logged-in user’s account, from order history to address books
- Admin API: The heavy-duty API for managing the backend of your store. It handles everything from creating products and collections to managing orders
Working with these APIs in a modern TypeScript environment presents a challenge: how do we keep our application’s code in sync with the API schemas? The answer is GraphQL Codegen.
GraphQL Codegen is a tool that introspects a GraphQL API’s schema and your app’s queries to automatically generate TypeScript types. This means no more guesswork, no more any types, and no more runtime errors caused by a misspelled field. It brings full type safety and IDE autocompletion to your data-fetching layer, making development faster and more reliable.
This article walked through a practical setup, starting with the default codegen configuration in a new Hydrogen project. From there, we showed how to integrate the Shopify Admin API. Finally, we guided you through building a fully typed, custom SDK for the Admin API that improves your developer experience and makes your application more reliable.
We began by scaffolding a new Hydrogen project with:
npm create @shopify/hydrogen@latest
Hydrogen ships with a .graphqlrc.ts file that configures GraphQL Codegen for two projects out of the box:
- default (Storefront API)
- customer (Customer Account API)
import type {IGraphQLConfig} from 'graphql-config';
import {getSchema} from '@shopify/hydrogen-codegen';

export default {
  projects: {
    default: {
      schema: getSchema('storefront'),
      documents: [
        './*.{ts,tsx,js,jsx}',
        './app/**/*.{ts,tsx,js,jsx}',
        '!./app/graphql/**/*.{ts,tsx,js,jsx}',
      ],
    },
    customer: {
      schema: getSchema('customer-account'),
      documents: ['./app/graphql/customer-account/*.{ts,tsx,js,jsx}'],
    },
  },
} as IGraphQLConfig;
The default project targets the Storefront API and scans most of your app for GraphQL queries. The customer project targets the Customer Account API and only scans app/graphql/customer-account.
Example Storefront query (app/routes/($locale)._index.tsx):
const RECOMMENDED_PRODUCTS_QUERY = `#graphql
  fragment RecommendedProduct on Product {
    id
    title
    handle
    priceRange {
      minVariantPrice {
        amount
        currencyCode
      }
    }
    featuredImage {
      id
      url
      altText
      width
      height
    }
  }
  query RecommendedProducts ($country: CountryCode, $language: LanguageCode)
    @inContext(country: $country, language: $language) {
    products(first: 4, sortKey: UPDATED_AT, reverse: true) {
      nodes {
        ...RecommendedProduct
      }
    }
  }
` as const;

export async function loader({context}: LoaderFunctionArgs) {
  const {storefront} = context;
  const {products} = await storefront.query(RECOMMENDED_PRODUCTS_QUERY);
  return json({products});
}
Example Customer Account query (app/graphql/customer-account/CustomerDetailsQuery.ts):
export const CUSTOMER_DETAILS_QUERY = `#graphql
  query CustomerDetails {
    customer {
      ...Customer
    }
  }
  // ... fragment definition
` as const;
Used in app/routes/($locale).account.tsx:
import {CUSTOMER_DETAILS_QUERY} from '~/graphql/customer-account/CustomerDetailsQuery';

export async function loader({context}: LoaderFunctionArgs) {
  const {data, errors} = await context.customerAccount.query(
    CUSTOMER_DETAILS_QUERY,
  );

  if (errors?.length || !data?.customer) {
    throw new Error('Customer not found');
  }

  return json({customer: data.customer});
}
Running:
npm run codegen
generates type definitions like storefrontapi.generated.d.ts and customer-accountapi.generated.d.ts, giving you typed results and autocompletion.
Common issues:
Failed to evaluate config: install ts-node as a dev dependency:
npm i -D ts-nodeCustomer Account type errors: ensure the more specific customer project is defined before the catch-all default/storefront project in .graphqlrc.ts.
From there, we integrated the Shopify Admin API.
We installed Shopify’s API codegen preset:
npm i -D @shopify/api-codegen-preset
Then updated .graphqlrc.ts to add an admin project and renamed default to storefront:
import type {IGraphQLConfig} from 'graphql-config';
import {getSchema} from '@shopify/hydrogen-codegen';
import {ApiType, shopifyApiProject} from '@shopify/api-codegen-preset';

export default {
  projects: {
    customer: {
      schema: getSchema('customer-account'),
      documents: ['./app/graphql/customer-account/*.{ts,tsx,js,jsx}'],
    },

    admin: shopifyApiProject({
      apiType: ApiType.Admin,
      apiVersion: '2025-04',
      outputDir: './types',
      documents: ['app/graphql/admin/**/*.{js,ts,jsx,tsx}'],
    }),

    storefront: {
      schema: getSchema('storefront'),
      documents: [
        './*.{ts,tsx,js,jsx}',
        './app/**/*.{ts,tsx,js,jsx}',
        '!./app/graphql/**/*.{ts,tsx,js,jsx}',
      ],
    },
  },
} as IGraphQLConfig;
We then configured the Admin API client. After creating a private app in the Shopify admin, assigning scopes (e.g. write_discounts), and retrieving the Admin API access token, we wired it into our environment.
env.d.ts:
interface Env extends HydrogenEnv {
  ADMIN_API_ACCESS_TOKEN: string;
}
.env:
ADMIN_API_ACCESS_TOKEN=your-token-here
Installed the Admin API client:
npm i @shopify/admin-api-client
And instantiated it in app/lib/context.ts:
import {createAdminApiClient} from '@shopify/admin-api-client';

export function createContext(
  request: Request,
  responseHeaders: Headers,
  env: Env,
) {
  const admin = createAdminApiClient({
    storeDomain: env.PUBLIC_STORE_DOMAIN,
    apiVersion: '2025-04',
    accessToken: env.ADMIN_API_ACCESS_TOKEN,
  });

  return {
    // ...other context
    admin,
  };
}
We created our first Admin mutation in app/graphql/admin/CreateDiscountCodeMutation.ts:
export const CREATE_DISCOUNT_CODE_MUTATION = `#graphql
  mutation createDiscountCode($basicCodeDiscount: DiscountCodeBasicInput!) {
    discountCodeBasicCreate(basicCodeDiscount: $basicCodeDiscount) {
      codeDiscountNode {
        id
      }
      userErrors {
        field
        message
      }
    }
  }
`;
Then ran:
npm run codegen
This generated admin-2025-04.schema.json, admin.types.d.ts, and admin.generated.d.ts in the types directory.
We could now call the mutation from an action:
import {CREATE_DISCOUNT_CODE_MUTATION} from '~/graphql/admin/CreateDiscountCodeMutation';

export async function action({context}: ActionFunctionArgs) {
  const {admin} = context;

  const {data, errors} = await admin.request(CREATE_DISCOUNT_CODE_MUTATION, {
    variables: {
      basicCodeDiscount: {
        // ...
      },
    },
  });

  // handle data / errors
}
That gave us type safety, but the DX still required importing raw GraphQL documents and calling a generic request method. To improve this, we built a type-safe Admin SDK.
Goal:
- Before:
context.admin.request(CREATE_DISCOUNT_CODE_MUTATION, { variables: { ... } }) - After:
context.admin.createDiscountCode({ basicCodeDiscount: { ... } })
To do this, we took full control over the codegen pipeline and added SDK generation.
We updated .graphqlrc.ts to explicitly configure codegen for each project and moved generated files into app/generated:
import type {IGraphQLConfig} from 'graphql-config';
import {getSchema, pluckConfig, preset} from '@shopify/hydrogen-codegen';
import {
  ApiType,
  preset as adminPreset,
  pluckConfig as adminPluckConfig,
} from '@shopify/api-codegen-preset';

const SHOPIFY_API_VERSION = '2025-04';
const outputDir = './app/generated';

export default {
  projects: {
    customer: {
      schema: getSchema('customer-account'),
      documents: ['./app/graphql/customer-account/*.{ts,tsx,js,jsx}'],
      extensions: {
        codegen: {
          pluckConfig,
          generates: {
            [`${outputDir}/customer-account.generated.d.ts`]: {
              preset,
            },
          },
        },
      },
    },

    admin: {
      schema: `https://shopify.dev/admin-graphql-direct-proxy/${SHOPIFY_API_VERSION}`,
      documents: ['./app/graphql/admin/*.{js,ts,jsx,tsx}'],
      extensions: {
        codegen: {
          pluckConfig: adminPluckConfig,
          generates: {
            [`${outputDir}/admin.schema.json`]: {
              plugins: ['introspection'],
              config: {minify: true},
            },

            [`${outputDir}/admin.types.ts`]: {plugins: ['typescript']},

            [`${outputDir}/admin.generated.d.ts`]: {
              preset: adminPreset,
              presetConfig: {
                apiType: ApiType.Admin,
                apiVersion: SHOPIFY_API_VERSION,
              },
            },
          },
        },
      },
    },

    storefront: {
      schema: getSchema('storefront'),
      documents: [
        './*.{ts,tsx,js,jsx}',
        './app/**/*.{ts,tsx,js,jsx}',
        `!${outputDir}/**`,
        '!./app/graphql/**',
      ],
      extensions: {
        codegen: {
          pluckConfig,
          generates: {
            [`${outputDir}/storefront.generated.d.ts`]: {
              preset,
            },
          },
        },
      },
    },
  },
} as IGraphQLConfig;
To generate the SDK, we installed the necessary plugins:
npm i -D @graphql-codegen/import-types-preset @graphql-codegen/typescript-generic-sdk
Then extended the admin project’s generates block to include admin.sdk.ts:
admin: {
  schema: `https://shopify.dev/admin-graphql-direct-proxy/${SHOPIFY_API_VERSION}`,
  documents: ['./app/graphql/admin/*.{js,ts,jsx,tsx}'],
  extensions: {
    codegen: {
      pluckConfig: adminPluckConfig,
      generates: {
        [`${outputDir}/admin.schema.json`]: {
          plugins: ['introspection'],
          config: {minify: true},
        },

        [`${outputDir}/admin.types.ts`]: {plugins: ['typescript']},

        [`${outputDir}/admin.generated.d.ts`]: {
          preset: adminPreset,
          presetConfig: {
            apiType: ApiType.Admin,
            apiVersion: SHOPIFY_API_VERSION,
          },
        },

        [`${outputDir}/admin.sdk.ts`]: {
          preset: 'import-types',
          presetConfig: {
            typesPath: './admin.generated',
            importTypesNamespace: 'Operations',
          },
          plugins: ['typescript-generic-sdk'],
          config: {importOperationTypesFrom: 'Operations'},
        },
      },
    },
  },
},
Running npm run codegen now generates app/generated/admin.sdk.ts, which exposes strongly typed functions for each operation.
We then implemented a requester bridge to connect this generic SDK to the Shopify Admin API client.
app/lib/admin-api-sdk.ts:
import {
  createAdminApiClient,
  type AdminApiClient,
} from '@shopify/admin-api-client';
import type {DocumentNode} from 'graphql';
import {getSdk, type Requester} from '~/generated/admin.sdk';

type AdminApiSdkConfig = {
  accessToken: string;
  storeDomain: string;
  apiVersion: string;
};

const createRequester = (client: AdminApiClient): Requester => {
  return async <R, V>(doc: DocumentNode, variables?: V): Promise<R> => {
    const query = doc.loc?.source.body;
    if (!query) {
      throw new Error('DocumentNode must contain a query string.');
    }

    const response = await client.request<R>(query, {
      variables: variables || {},
    });

    if (response.errors) {
      throw new Error(JSON.stringify(response.errors));
    }

    if (response.data === undefined) {
      throw new Error('No data received from API');
    }

    return response.data;
  };
};

export const createAdminApiSdk = (config: AdminApiSdkConfig) => {
  const adminApiClient = createAdminApiClient({
    storeDomain: config.storeDomain,
    apiVersion: config.apiVersion,
    accessToken: config.accessToken,
  });

  const requester = createRequester(adminApiClient);

  return getSdk(requester);
};
Finally, we integrated this SDK into the Hydrogen context.
app/lib/context.ts:
// import { createAdminApiClient } from '@shopify/admin-api-client'; // removed
import {createAdminApiSdk} from '~/lib/admin-api-sdk';

export function createContext(
  request: Request,
  responseHeaders: Headers,
  env: Env,
) {
  // ...other context setup

  const admin = createAdminApiSdk({
    storeDomain: env.PUBLIC_STORE_DOMAIN,
    apiVersion: '2025-04',
    accessToken: env.ADMIN_API_ACCESS_TOKEN,
  });

  return {
    // ...
    admin,
  };
}
With this in place, our route actions no longer need to import GraphQL documents or call a generic request method. Instead, they call typed SDK functions.
Before:
import {CREATE_DISCOUNT_CODE_MUTATION} from '~/graphql/admin/CreateDiscountCodeMutation';

export async function action({context}: ActionFunctionArgs) {
  const {data} = await context.admin.request(CREATE_DISCOUNT_CODE_MUTATION, {
    variables: {
      basicCodeDiscount: {
        // ...
      },
    },
  });
}
After:
export async function action({context}: ActionFunctionArgs) {
  const {discountCodeBasicCreate} = await context.admin.createDiscountCode({
    basicCodeDiscount: {
      // ...
    },
  });

  // use discountCodeBasicCreate.id, handle userErrors, etc.
}
The result is a cleaner, more intuitive, and fully type-safe integration with the Shopify Admin API. Queries and mutations are validated at build time, variables are strongly typed, and responses are autocompletable and safe to consume.
We’ve gone from Hydrogen’s default codegen setup to a fully customized, production-grade workflow:
- Leveraging Hydrogen’s built-in Storefront and Customer Account codegen configuration
- Integrating the Shopify Admin API with official presets
- Moving to an explicit, fine-grained codegen pipeline
- Generating a dedicated, type-safe Admin SDK
- Wiring that SDK into Hydrogen’s context for ergonomic usage across loaders and actions
This is the kind of foundation we rely on at FocusReactive when building content-rich, headless commerce experiences. By investing in type safety and tooling like GraphQL Codegen, you reduce bugs, speed up development, and keep your codebase maintainable as your application and team grow.
If you’re planning a modern Shopify-based storefront, migrating to headless, or want to level up your Hydrogen architecture and DX, we can help. As a Headless Commerce agency, we design and implement scalable, high-performance solutions tailored to your brand.
If you’d like to discuss your setup or get a free consultation on your headless strategy, get in touch: https://focusreactive.com/#contacts.
FAQ
Explore common questions about setting up GraphQL Codegen for Shopify Admin API in Hydrogen, and learn about its practical implications, strategic comparisons, and more.
More posts on related topics

CMS Migration: How to Switch to Headless the Right Way (Complete Guide)
A practical guide to CMS migration in 2026: SEO risks, content modelling, realistic costs, and what a well-run migration actually looks like from kick-off to post-launch.

Static Websites: Complete Evolution Guide
In this guide, we show what static websites are, explore how it all started and explain why we have returned to them. Discover why modern static sites dominate in 2026: lightning-fast loading speeds, ironclad security, and unbeatable SEO, powered by Next.js + headless CMS like Sanity and Storyblok.

Vercel: Expert Next.js Deployments for Headless CMS & E-commerce
Vercel powers Next.js-first headless CMS and e-commerce deployments with edge caching, serverless functions, and global scalability. This guide shows web agencies how Vercel's instant deploys, analytics, and collaborative workflows accelerate headless projects from prototype to production.

Best Headless CMS for Shopify: Sanity & Storyblok for Headless Commerce
Find the best headless CMS for Shopify. Discover why Sanity and Storyblok lead the pack with superior Shopify integrations, scalable architecture, and marketing workflows designed to help e-commerce teams move faster.
Best Next.js Headless eCommerce Platforms
Discover the top Next.js headless eCommerce platforms, weighing their pros and cons to help you make an informed decision for your online store. Dive into our comprehensive comparison and find the perfect solution for your business's unique needs.
Custom eCommerce ChatGPT Apps with Shopify
ChatGPT’s Shopify integration enables in-chat shopping, but merchants lose control over branding, data, and margins. This article introduces an SDK for building custom ChatGPT shopping assistants with full ownership and zero commission.